This is a quick user guide on how to log-in and setup meetings with CloudBunch Video Conferencing Solution
website: https://live.conf.cloudbunch.co.uk you will need to contact us to setup an account if you have not done that already click here
It’s easy and simple to use.
Why Choose Our Video Conferencing Solutions
Quick and Easy to setup
- Free setup
- Free maintenance
- Free support
- No Limit on One to One Sessions
Simple Scalable and Secure
- Simple to use
- Scalable add more as your business grows
- End-to-End encryption
- Background blur
- Custom Background image
- Chat
- Send emojis & messages during a video call
- Share screen, documents and more
Always stay connected
- Access anywhere with an internet connection 24/7
- Turns your laptops, mobile phone, and tablets into a mobile office
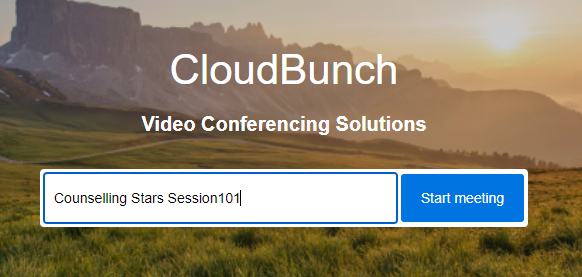
Step1: you can start a new meeting by login into website: https://live.conf.cloudbunch.co.uk then typing your company name and Session-id and clicking ‘Start meeting’
Step 2: Allow the use of a camera and microphone

Import note: keep the session id unique to each client session.
You can share the URL with the participants’
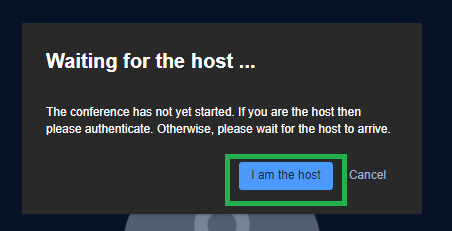
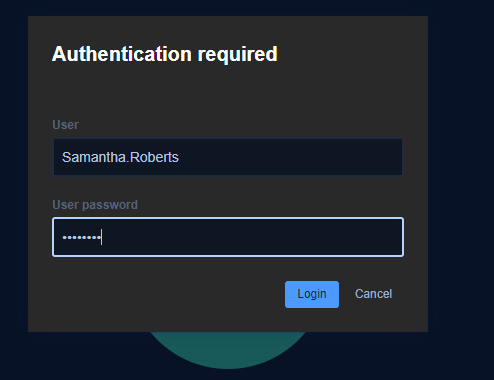
You will see this screen click on I am the host and enter the User name and password which is given below:
The login credentials will be send you via email.
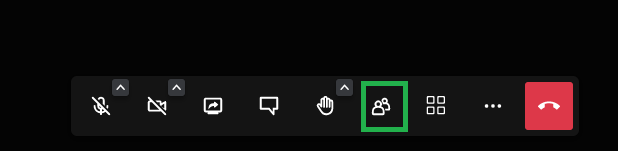
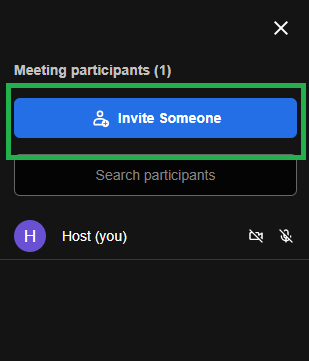
To share the meeting click on the users
Then click on Invite someone
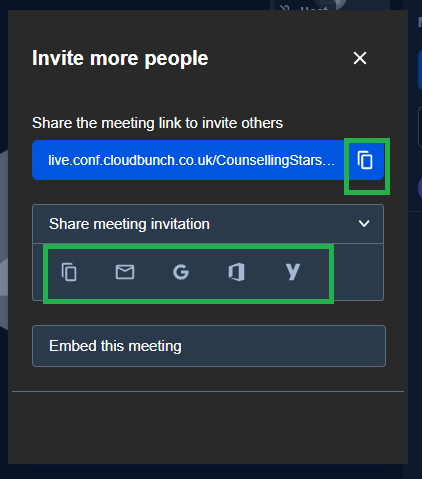
You can then copy the link URL
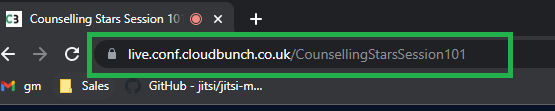
Another way to create and share a meeting is by URL appended by the meeting name is all that you need. In this case, it will be https://live.conf.cloudbunch.co.uk/ Meeting name for your clients and you can share it just by coping the url and share it with the participants/clients
as shown below
For more information about the conferencing solutions you check out website https://old.cloudbunch.co.uk/video-conferencing-solutions/
How to set up a name and photo
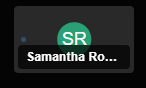
By default your name will be appearing as Host you can customize to your name
to set a name and photo to your profile, click on the 3 dots and click on Settings
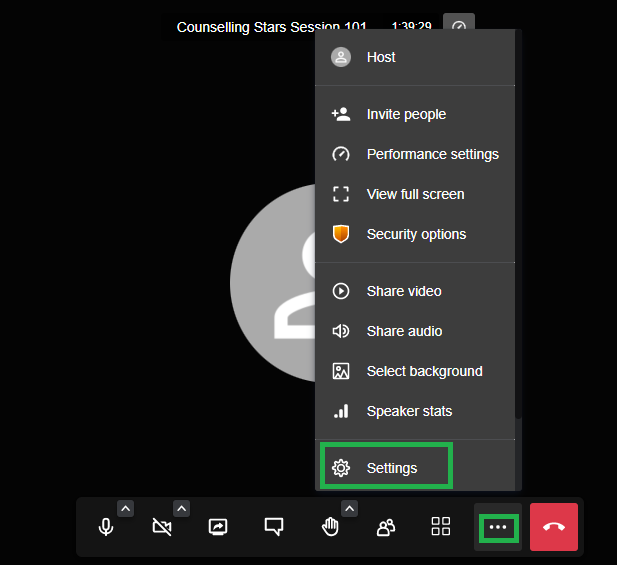
Click on Profile, mention your name how you want it to be displayed in ‘Set your display name’
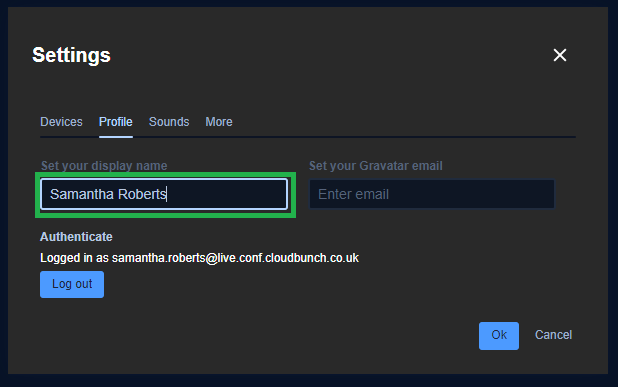
You can setup a display name
How to set up a photo
For setting up a photo you will need to set your Gravatar email address, If you don’t have one login to Gravatar website https://en.gravatar.com/ its quick and easy to setup.
Meet Tips & Tricks
Cloud Bunch Video Conferencing Solution (CloudBunch VCS) has several features to offer like screen sharing, recording meetings, switching to tile view, etc. Using them you can host a meeting flawlessly.
Aways create a new meeting URL and keep it complex do not use vanity names example session one or test meeting
instead user your companyname meet with Samant session112
Import note: keep the session id unique to each client session.
Hope you enjoyed reading, now you can host one to one conference for unlimited time.
Mohammed Rafeeq
CloudBunch Team